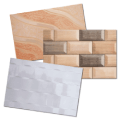
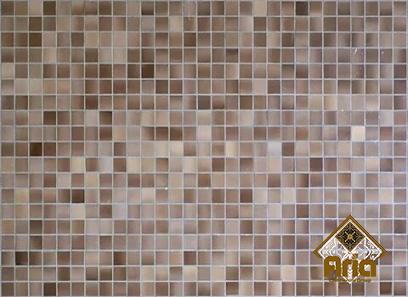
Regarding 50 rupees tiles, the mosaic tiles that resemble basket weave patterns are known as basketweave tiles. They are square and small rectangular walls and mostly floor tiles combined to give the beautiful appearance of being woven into a basket.
These tiny tiles are attached to a layer of fiberglass mesh in the back and are spaced uniformly apart. This is a typical method for arranging mosaic tiles so that fast section-by-section installation is possible. Glass, porcelain, natural stone, and other materials are all available in basket-weave floor tiles.
Their fashions also differ in terms of patterns, colors, thinness, and directions. The most typical one is typically composed of black squares in the middle of white marble stone rectangles.
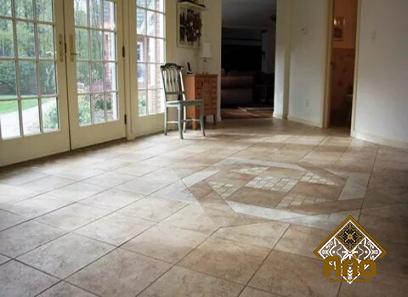
There are additional types of basket weave tiles. When it comes to application, basket weave tiles are ideal for use in bathrooms, kitchens, entryways, gardens, floors, and walls.
Its timeless design makes it a secure and sophisticated option for indoor décor. What do we need to install basket weave floor tiles? Tools: pencil: for laying down markings, Bucket:
used to mix grout, Caulking Gun: for applying caulk, Hand protection gloves, Tile Grinder: used for tile trimming and cutting, use a rubber mallet to tap tiles.
Concrete Board: “To provide a substrate for vertical tile, cement board may be fastened or screwed to wood or steel studs.
For tile floors, kitchen countertops, and backsplashes, cement board can be mounted horizontally to plywood.” If you have a cement board, check to see that it is clean and flat.
Make sure the board is level if you don’t want your tile surface to bob up and down. Additionally, wash the board’s surface to get rid of any oil stains, which reduce the tiles’ adhesion.
Make use of a thin-set adhesive. If you already have plasterboard or plywood, you could decide to put on a layer of cement board first. Alternately, use a latex adhesive.
Ensure that the surface is level and clean as well. Layout for Mark Basket Weave Tiles 2: Before installation, make plans.
Create a layout outline for the tile backsplash or other surfaces. To indicate the center and edge of mosaic tile portions, draw vertical lines. You will eventually grout well if you do this.

preparing a tile layout; Start in the middle and work your way outward, or do it the opposite way around. The key guideline is to install whole areas of basket weave tile before taking care of the borders and edges. 3.
Use adhesive; Once the arrangement has been defined, you may begin to coat the board or plywood with glue. As suggested in Step Two, use a layer of latex glue for plywood or drywall in place of a thin-set adhesive for the cement board. The glue should be distributed with a notched trowel.
The size of your tiles or the adhesive will determine the type of notch trowel you should use. A v-notch trowel is often used for smaller tiles. Making use of tile adhesive:
The appropriate quantity of glue should be thick enough to completely cover the desired region. What thickness is ideal?
Well, the adhesive furrows allow you to view the cement board. How should I use adhesive? Pave Tiles Although this step can seem simple, it is important that you pay attention.
Pave the area with basket weave tiles and move them about until they are perfectly aligned with the arrangement. Release the tile part slowly in case it slips.
Applying-Tiles.5. Gently tap the tiles; The tile part still has to be finished. Because of the “bumps” in the adhesive layer, the tile’s surface is not perfectly smooth. You should now have your rubber mallet ready to use!
Leather Mallet; Till the tile surface is level and smooth, gently tap it into the glue. You may feel it with your touch or see it visually.
It’s an important stage that you should never skip. 6. Add Additional Sections; It’s time to add tiles to other locations by going through Steps 2 through 5 again.
Use plastic tile spacers to precisely position the tile sheets as you install the tiles in Step 4. In Step 5, when you press the tiles, pay close attention to the boundaries between the tile sheets in case they rise. 7.
Edge-Trimming Tiles; To trim tiles piece by piece as you see fit, use a tile nipping tool. It isn’t complicated science. It just requires time and effort.
Make sure you have enough tile sheets prepared for the edges since, if you are novice, you can struggle to cut individual pieces at first. 8. Round the Corners; Repeat Steps 4 through 5 using the cut pieces to fill in the edges.
Use a moist sponge to clean the tile surface after all of the tiles have been installed in order to remove any extra glue. Prior to grouting, let the glue for 24 to 48 hours to completely cure and attach the tiles. 9. Make the grout; You must correctly prepare your grout before grouting.
The kind of grout you chose will depend on how wide the grout seams are. Use un sanded grout for gaps that are less than 0.35 cm wide and sanded grout for those that are bigger.
Start mixing the grout powder in a bucket. Pay close attention to the instructions provided by the grout product. 10. Use grout; Be sure to remove the tile spacers before we begin grouting.
Their tasks are done and we don’t want them in the way of our grout. Spread the grout over the tile seams and press it firmly into them using a grout flow to absorb enough grout.
Clear away any extra grout from the tile’s surface. Repeat this procedure many times for each location to allow the grout to penetrate deeply into the seams. 11.
Clean Up the Area; After grouting is complete, remove extra grout with a moist sponge. Before cleaning the tile surface, squeeze off excess water from the sponge and scrub the surface diagonally while washing the sponge as often as you can. The grout must not be diluted, please. 12.
Use a sealant; After grouting for 24 hours, we can finally seal the deal by applying sealant! Use a caulking gun to apply silicone sealant to the edges and grout sealer to the grouts. We should be fine to travel in around 10 days after the joint has dried.


Your comment submitted.