Do you why all tiles, especially porcelain tiles should be soaked in water before laying them? Since the beginning, tiling has been a very perplexing process.
From a distance, the procedure appears to be rather straightforward: just level the surface, apply cement, mortar, or glue, and begin installing tiles, right? But you only truly understand the situation’s complexity when you are up close and personal.
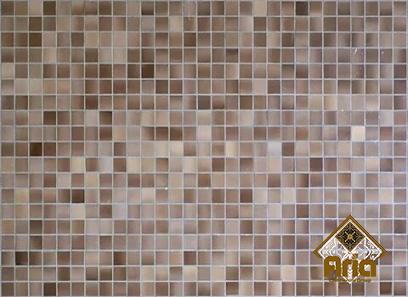
Many various kinds of tiles are available today, ranging from those constructed of certain materials to those with specific sizes and designs.
Even the tiniest variation while tiling necessitates a change in method. The question of whether to soak tiles before installing them is a good illustration of this.
The fundamental rationale behind soaking or wetting tiles before installation is that they hold a lot of air because their bases are porous.
Dry tiles will initially adhere when placed directly on top of mortar or cement, but they will likely come off over time. By soaking them, you are substituting the air with water and enabling the mortar or cement to adhere firmly on top.
Before placing them, let’s take a closer look at why, how, and when to dampen or soak tiles.
Why Would You Soak Tiles?
As indicated, the goal is to fill tile gaps. After putting tiles in a bucket, air bubbles continue to rise. Once they stop, you may apply the tile.
This is an issue in poor nations or on farms where the tile-laying adhesive is rare. Concrete is instantly tiled (without mixing aggregate). Asia, Africa, South America, and other places have instances. Europe also uses this strategy.
Dry tiles absorb water when placed on glue or cement. The cement or glue underneath will dry out and lose its stickiness. After a few weeks, the tile adhesive loosens. In warmer regions, wall tiles will ultimately fall off.
When placing tiles over silicone glue, epoxy, mastic, or any liquid-based adhesive, don’t wet them. The same is true for stone tiles.
Which tiles should be moist before installation?
Before soaking tiles, consider two important aspects. Cut the tiles? If so, chop them before soaking to avoid blade damage or sharp edges.
Consider the tile’s composition. Stone-based tiles, for example, don’t need to be moistened. In particular, red clay terracotta tiles must be fully soaked.
Soaking red clay tiles helps establish a strong link between them and makes the tiles stronger.
White clay tiles must also be fully soaked, but this time it’s only for the benefit of the adhesive’s strength and has nothing to do with the strength of the tile itself.
Just use a brush or a light sprinkle of water to moisten the clay layer beneath the top layer of porcelain and ceramic tiles. You can get away without watering the ceramic tile’s sublayer, but we advise you to wet porcelain tiles specifically.
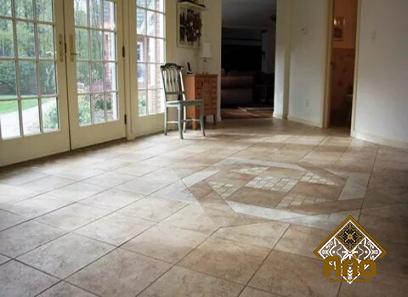
Using porcelain tiles to cover a concrete block wall outside
The thickness of the tile you are installing is another critical aspect to consider. Simply wash the tile if it is less than one centimeter thick. It is not essential to soak. All you need is a quick splash, brush, or sponge. If it is any thicker, and you’ll need to soak the tile as well as let it dry a little. The tile will start to slide if it is wet and immediately put on top of the glue or cement.
You’ll probably notice dust under the tiles if you ordered a large quantity or if they aren’t just out of the kiln. After cleaning, soak it. Alternatively, you might submerge the tile in water before cleaning it. Under no circumstances can the tiles be left filthy.
Check to see if you can remove the tiles and soak them if you neglected to water them. Under no circumstances should water be splashed on top since this might cause the cement or adhesive to become loosened. If you forgot, leaving it alone is the best option. Dry it out. Apply the top coat of grout after making it a little runnier. But don’t overwater.
Don’t fill it all the way. Anything dry beneath should absorb the surplus moisture if there is anything dry there. After allowing it to cure as well, properly grout the tiles.

Granite tiles should be moistened and wiped down for dust if you’re using them. All you need is a wet sponge. Just keep in mind to rinse the sponge after every tile.
Utilizing the Proper Water
Although it might not seem significant, the water you use will affect how efficiently your tiles absorb water. Of course, the tile will absorb whatever type of water you pour to it, but your safety is the priority here, not the tile’s.
When gathering water to soak or wet your tiles, keep the following things in mind:
Never utilize water from spillways or reservoirs. Even while it would appear like a very economical approach to soak tiles, doing so will almost certainly result in the growth of germs or fungus below the tiles. Additionally, you’ll be letting mold and fungus into the home.
Consider changing the water after you’ve soaked a batch.
Use neither liquid nor dry detergents in the water. These will build up an oily coating on top, preventing the adhesive from functioning properly.
Porcelain tiles typically absorb less than 0.5% of water, compared to 10% for glazed wall or floor tiles. Contrarily, ceramic only absorbs 0.1% of water, which is why we said that you might get away with not soaking it in the same amount.
How Do I Wet or Soak a Tile?
As previously discussed, several ways to soak or wet a tile exist. You just need to soak the tile’s sublayer, except for clay tiles. Use a brush or a sponge if all you want to do is moisten it.
BrushWater the brush well. To ensure that water adequately permeates into the bristles, try to “paint” the container wall with water.
Then, remove the brush and paint your tiles without allowing the extra paint to drip off. Usually, two up-and-down strokes are sufficient to provide complete coverage.
Sponge
Let the sponge absorb all the water by submerging it in it. Gently pick it up and squeeze it. The sponge doesn’t need to be fully dry, nor does it need to be dripping with water. Once more, two passes are plenty to moisten your tiles.
Soaking Investing in a sizable bucket of water is a smart move. A minimum of twice the size of your tiles should be used. Instead of balancing them, it is preferable to set the tiles flat and stack them on top of one another to soak.
While the latter method also works, there is a chance that your tiles will shatter when you try to take them out.
Remove the tiles and give them some time to rest. If you hear bubbling, that is the tile releasing air and soaking up water.
Wait until the fizzing stops before removing the tiles. Before removing the tiles, we advise letting them soak for at least 20 to 30 minutes.


Your comment submitted.